Building a 3D Shadow Box: A Practical Guide to Layered Paper Crafts
Creating a personalized gift often feels like a balancing act between thoughtfulness, budget, and available time. While store-bought items offer convenience, they frequently lack the emotional resonance of something handmade. This is where building a 3D shadow box emerges as a compelling option for crafters and hobbyists alike. Unlike traditional flat framing or standard scrapbooking, this technique introduces depth, perspective, and narrative layering to paper crafts. By combining precise cutting with strategic assembly, you can transform simple cardstock into intricate scenes that serve as both decorative art and meaningful keepsakes.
The appeal of this medium lies in its accessibility. You do not need advanced artistic skills or expensive machinery to produce professional-looking results. Instead, success relies on understanding spatial relationships and following a structured process. For those evaluating whether to invest time in this craft, it is essential to understand what makes building a 3D shadow box distinct from other DIY projects, how it compares to similar alternatives, and which specific scenarios make it the ideal choice for your next creative endeavor.
Understanding the Mechanics of Depth in Paper Crafts
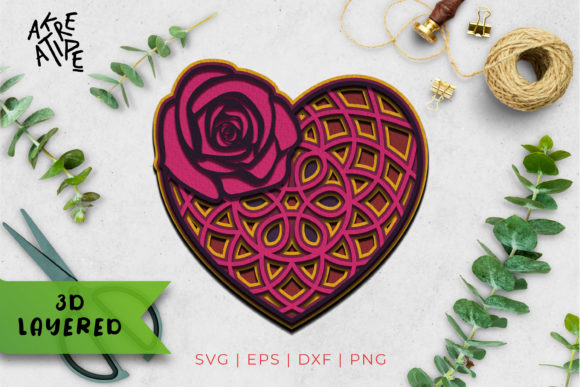
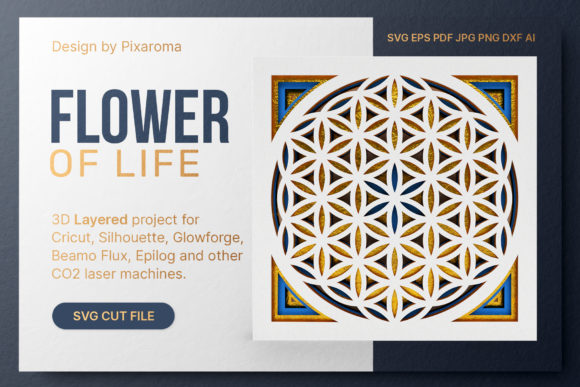
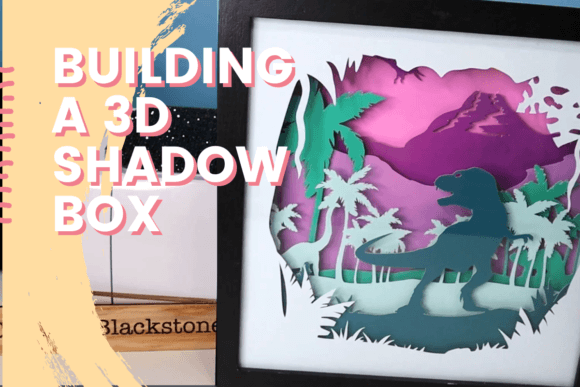
At its core, building a 3D shadow box involves creating multiple layers of imagery that are spaced apart to simulate three-dimensional space. In a standard picture frame, all elements lie on a single plane against the backing. In contrast, a shadow box utilizes spacers—often foam tape, wooden stands, or specialized brackets—to lift each layer forward. This separation allows light to cast subtle shadows, adding realism and visual interest to the design.
The process typically begins with designing a scene. Whether the theme is a wedding anniversary, a baby’s nursery, or a favorite travel destination, the design must be broken down into foreground, midground, and background elements. Each element is then cut from cardstock or heavy paper. The precision of these cuts determines the final clarity of the image. Talented crafter Corinne Blackstone emphasizes that sizing your design correctly for the chosen box is the most critical first step. If the layers are too large, they will overlap awkwardly; if they are too small, the scene may feel empty. Downloading a template, such as those provided in instructional classes, ensures that the proportions align perfectly with the physical dimensions of the box.
The Role of Templates and Precision
One of the primary advantages of using templates when building a 3D shadow box is consistency. Hand-drawing complex scenes can lead to asymmetry or misalignment, particularly for beginners. Templates provide a reliable guide for cutting, ensuring that every piece fits together seamlessly. They also help in planning the spacing required for each layer. For instance, a template might indicate that the background layer should sit two inches back from the glass, while the foreground figure sits only half an inch back. This planning phase reduces material waste and minimizes frustration during assembly.
Furthermore, templates allow for experimentation without committing to expensive materials. Digital designs can be adjusted easily before printing, whereas cutting mistakes in thick cardstock can ruin the entire project. By utilizing downloadable resources, crafters can refine their vision digitally, saving time and resources in the physical crafting stage.
Evaluating Alternatives: How Does It Compare?
When considering homemade gifts or home decor projects, consumers often weigh several options. To determine if building a 3D shadow box is the right fit, it helps to compare it with other popular crafting methods such as flat framing, digital photo collages, and resin art.
- Flat Framing vs. Shadow Boxing: Flat framing is quicker and requires fewer materials. However, it lacks the tactile engagement and visual depth of a shadow box. Shadow boxes are better suited for displaying objects with volume, such as dried flowers, fabric swatches, or layered paper cutouts. If the goal is to create a striking visual statement that draws the viewer in, the shadow box is superior. If the goal is simply to display a photograph quickly, flat framing remains the more practical choice.
- Digital Photo Collages: Digital collages are cost-effective and infinitely editable. They are ideal for sharing on social media or printing as posters. However, they lack the physical presence of a handcrafted item. A 3D shadow box offers a tangible connection to the maker’s effort. For recipients who value sentimental value and physical artifacts over digital convenience, the shadow box provides a stronger emotional impact.
- Resin Art: Resin projects can achieve a stunning glossy finish and incorporate real objects. However, they require safety precautions due to chemical fumes, long curing times, and precise mixing ratios. Building a 3D shadow box is generally safer, cleaner, and faster. There is no waiting for glue or resin to dry overnight. This makes shadow boxing a more accessible option for beginners or those working in shared living spaces.
Decision Factors: When to Choose This Method
Selecting the right craft depends on your specific goals, constraints, and skill level. Here are key factors to consider when deciding to invest in building a 3D shadow box.
Skill Level and Learning Curve
This craft is beginner-friendly but offers room for advanced complexity. Basic shadow boxes require only scissors, adhesive, and patience. Advanced versions may involve laser-cutting tools, intricate die-cuts, and custom painting. If you are new to crafting, starting with a pre-made kit or a class template, like those offered by experts such as Corinne Blackstone, provides a supportive learning environment. These resources break down the process into manageable steps, reducing the intimidation factor often associated with DIY projects.
Budget and Material Costs
The cost of building a 3D shadow box is relatively low compared to many other hobbies. Cardstock is inexpensive, and shadow boxes themselves can be found at discount stores or made from repurposed frames. The main expense might be specialized cutting tools if you plan to pursue the craft extensively. However, for occasional gifting, the initial investment is minimal. In contrast, resin art requires buying molds, pigments, and resin, which can add up quickly. For budget-conscious crafters, paper-based shadow boxing offers high aesthetic returns for low financial input.
Time Commitment
While building a 3D shadow box is not instantaneous, it is significantly faster than knitting, crocheting, or woodworking. A typical project can be completed in a few hours, depending on the complexity of the design. This makes it an excellent option for last-minute gifts or weekend projects. The assembly process is straightforward: cut, score (if necessary), adhere spacers, and stack. There is no waiting for paint to dry or wood to cure, allowing for immediate gratification.
Practical Applications and Gift Ideas
The versatility of building a 3D shadow box allows for a wide range of applications. Because the style can be adapted to any theme, it serves as a flexible solution for various occasions.
- Milestone Celebrations: Create a scene representing a couple’s journey, using layers to depict different locations visited or years celebrated. The depth adds a narrative quality that flat photos cannot match.
- Holiday Decor: Seasonal themes, such as winter wonderlands or autumn harvests, benefit greatly from the layered effect. Snowflakes in the foreground and trees in the background create a cozy, immersive atmosphere.
- Hobby Displays: For friends with specific interests, such as gardening, music, or sports, a shadow box can showcase memorabilia alongside illustrated elements. This personalization demonstrates deep attention to the recipient’s passions.
Limitations and Considerations
Despite its benefits, building a 3D shadow box has limitations. The finished product is fragile; the protruding layers can be knocked out of alignment if bumped. It is not suitable for high-traffic areas or homes with young children and pets unless secured properly. Additionally, dust accumulation between layers can be difficult to clean. Using anti-static spray or sealing the box tightly can mitigate this issue, but it remains a maintenance consideration.
Another limitation is the reliance on good lighting. The beauty of shadow boxes comes from the interplay of light and shadow. In dimly lit rooms, the depth effect may be less apparent. Positioning the box near a window or under focused lighting enhances the visual impact.
Final Thoughts on Choosing Your Craft
Ultimately, the decision to engage in building a 3D shadow box should align with your desire for creativity, personalization, and manageable complexity. It offers a unique middle ground between simple crafts and complex artistic endeavors. By leveraging templates, understanding spatial design, and selecting appropriate materials, you can create impactful gifts that stand out in a sea of generic presents. Whether you are drawn to the meditative process of cutting and assembling or the joy of giving a deeply personal token, this craft provides a rewarding outlet for self-expression. As you explore this medium, remember that perfection is less important than intention. The slight imperfections of a handmade item often contribute to its charm and authenticity, making it a truly special addition to any home.